Sometimes it's really not that bad having to make your own birthday cake. Case in point:

I
made an adjustment to the following recipe when I made it today - I didn't have a 10-inch
cake pan, so decided to make two 8-inch cakes instead. I can do that, dammit; I'm
a grown-up. And besides, it's my birthday. In order to do this I changed the following:
- increase maple syrup to 1 ¼ cups
- increase apples to 4
- baking time decreased to about 50 minutes - just keep an eye on it.
So, moving on to the pertinent stuff, namely THIS:

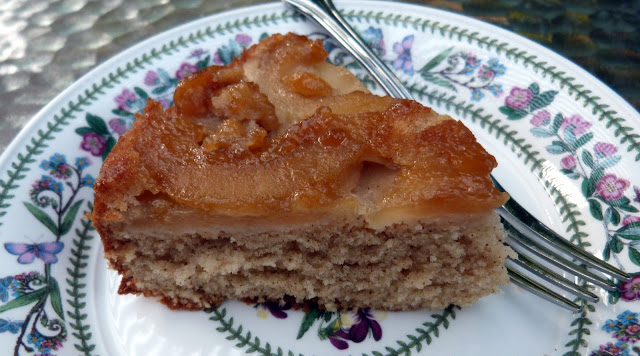
Maple Apple Upside-Down Cake
1 cup pure maple syrup
3 Granny Smith apples, peeled, cored and sliced - one of those old-fashioned apple peelers is highly recommended!
2 cups flour
1 teaspoon baking powder
½ teaspoon baking soda
1 teaspoon salt
1 teaspoon cinnamon
½ teaspoon allspice
3 large eggs
¾ cup buttermilk
2 tablespoons apple liqueur (optional, but a nice addition if you have some)
1 tablespoon vanilla extract
1 ½ sticks unsalted butter, softened
1 1/3 cups sugar
Preheat
oven to 350F. Grease and flour a
10-inch round cake pan. In a small
saucepan, bring the maple syrup to a boil over high heat, then simmer over low
heat until very thick and reduced to ¾ cup, about 20 minutes. Pour the thickened syrup into the cake
pan. Arrange the apples in the pan in 2
concentric circles, overlapping them slightly.

In a bowl, whisk the flour, baking powder, baking soda, cinnamon,
allspice, and salt. In a small bowl,
whisk the eggs with the buttermilk and vanilla (and liqueur, if using). In the bowl of a standing electric mixer
fitted with the paddle, beat the butter and sugar at medium speed until fluffy,
about 3 minutes. Beat in the dry and
wet ingredients in alternating batches until the batter is smooth; scrape down
the side of the bowl.
Scrape the batter over the apples and spread it in
an even layer.

Bake the cake for 1 ½
hours, until golden on top and a toothpick inserted in the center comes out clean.
Let the cake cool on a rack for 30-45 minutes. Place a plate on top of the cake and invert the cake
onto the plate; tap lightly to release the cake. Remove the pan gently. Let the cake cool slightly before cutting.


